So for a week or so I’ve had this idea in my head that I wanted to make a combination chalkboard and coffee filter wreath. A chalkboard coffee filter wreath. Now, I have my share of chalkboards but I don’t use them very often. So I thought it would be fun to combine a chalkboard with a wreath because I use wreaths all the time. What could be more fun than a wreath you can leave up all the time that you can still make seasonal by writing or drawing on it.
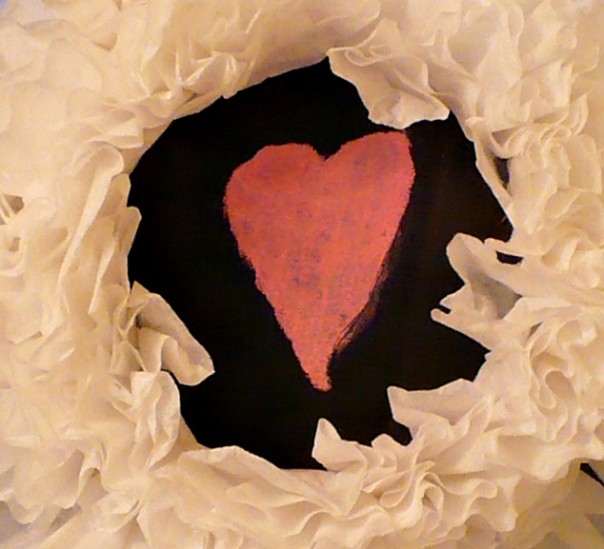
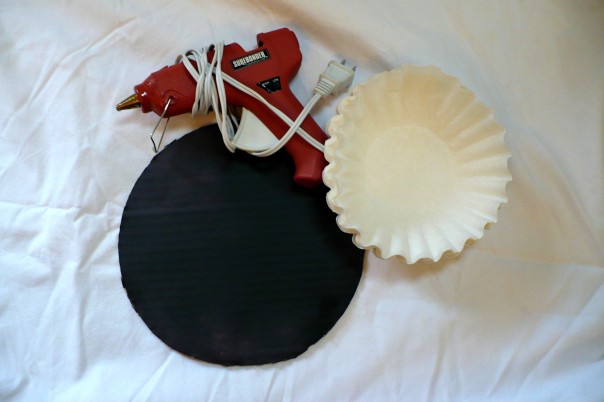
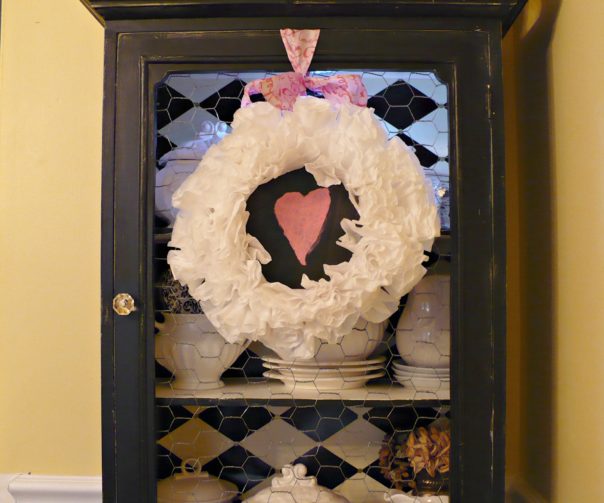
So to test out my idea I made a little Valentine Chalkboard Wreath. It’s really easy and all you need to make it is:
Disclosure: This post may contain affiliate links to Amazon and/or Etsy, which means that I may earn a small commission from some of the links in this post. Please see our Disclosure Page for more information.
- Cardboard
- Coffee filters – They come in natural (brown) and white. The fun thing about coffee filters is that you can dye them any color you want. Buy them at the dollar store and you’ll have tons for lots of projects.
- Glue Gun
- Chalkboard spray paint which will last you for several projects
…and of course some chalk
Chalkboard Wreath Tutorial
You can chalkboard paint anything! I’ve done a mirror (see here), on glass, metal, plates (see here) you name it & I’ve probably sprayed it with chalkboard paint. So yes, I used a piece of cardboard for this project because that’s what I had on hand.
Step 1
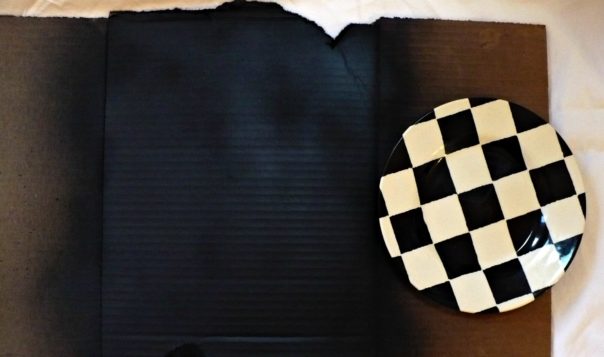
Spray a piece of cardboard with some chalkboard paint. I did several coats.
Step 2
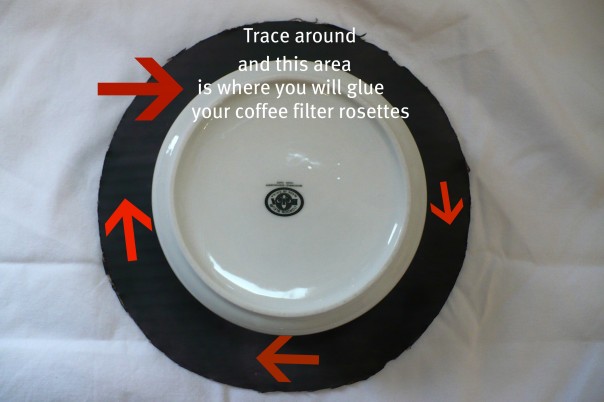
You are going to cut a shape out of your cardboard so choose something as your template. I chose a small circle, you may want a rectangle or oblong – whatever. Trace your object (I used my fav checkerboard plate) and cut out your shape. Then decide how much chalkboard you want versus how much wreath area. I used a bowl to make my inside circle.
The area in between the edge of the cardboard and the line of your inside circle is where you are going to glue the coffee filters. That’s the wreath part.
Step 3
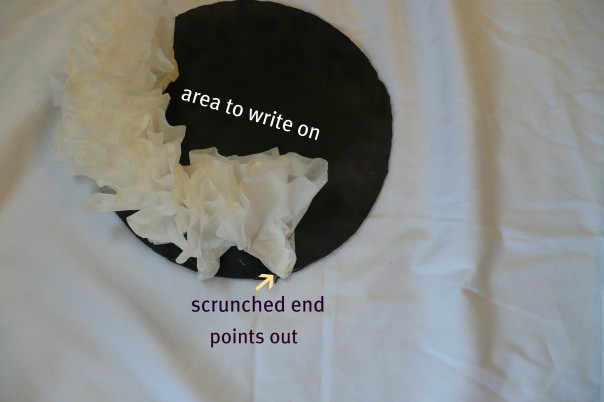
Now you’re going to make a rosette by scrunching the filter from the center and then you hot glue it all around your form. Be careful not to burn your fingers. Those filters are thin! I used a popsicle stick and am happy to report that for once I did not burn myself! Start on the inside with the scrunched up end pointing away from the center.
Step 4
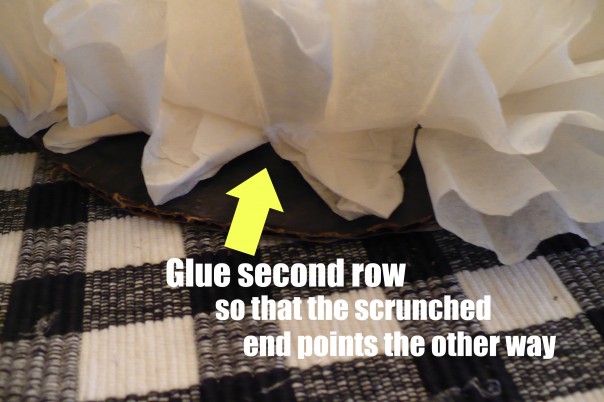
Because my wreath only needed two rows of filter rosettes – I glued my second row in the opposite direction. With the scrunched end facing in. My second row then fell in between my first row. If you’re doing a larger wreath, just keep adding rows.
Step 5
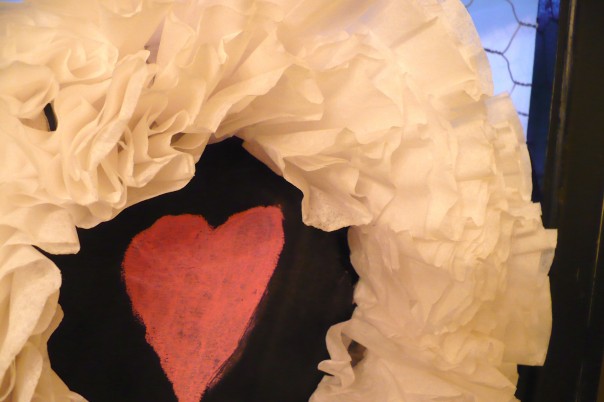
Glue a ribbon onto the back, use your chalk and write/draw something and then hang.
Step back and admire your pretty decorative chalkboard coffee filter wreath!
This was such a quick and easy project and used inexpensive materials. I’m very happy with my little test wreath and will definitely make a larger one!
Absolutely “LOVELY” Valentines project. SOOO pretty. You are the Craft Queen, Manuela. What a VERY easy tutorial. Thanks so much for sharing your ideas. It looks so cute there. Your house is always going to be festive whatever holiday,….this I know. 🙂 🙂 FUN! Have a wonderful Friday. Hugs sent to GA!
What a great Valentine’s Day project. I would love to hang one on each of my children’s doors with “love notes” from mom on them. I hope I will have time after we move. I think it would help them feel a bit better about the transition.
Have a wonderful weekend!
Cute!!! Thanks for sharing!
How cute!!!! I love that you can make it seasonal however you want. Pinning this! 🙂
I made a coffee filter wreath over a year ago, and I absolutely love it! This is a cute idea.
What a cute valentine craft. Love this!
That is cute and sweet!
I should show this to my girls – they would love it!
HOw cute is this?!! I love it, love using such reasonably priced items!
I love this! So charming and fun…and affordable!
🙂 Amy
OMG too cute! I am going to try that:) Thanks for sharing the HOW-TO with us! Have a blessed weekend dear friend, HUGS!
Now that’s a sweet idea. I must brew a pot of tea and visit for a while just as soon as I can. I’ve missed too many of your posts. I must also add your new home in a visual link so I can tell you are here. I tend to forget when you are only listed and I don’t see the cute little pic of the day.
I did a wreath this week too–they are fun, aren’t they!
What a cute project! It’s great that you can use this for many seasons by changing what’s hanging in the middle or by changing what you write in the chalkboard part.
I love the coffee filter wreaths and have always wanted to do one. I want to do a cupcake liner one, too. I’m almost positive that you were the one who originally inspired that, too. It was on the old site so I’m not sure.
Anyway, I love the idea of making it versatile for the holidays.
Now, if I can get some gumption, I might actually copy you.
I loe your wreathe! It’s so unique and so pretty! I want to make one, too.
Hugs, Cindy