I don’t know about you, but I love ice cream, especially during the summer! But if you’ve ever tried to serve ice cream at an outdoor party, then you know how hard it is to keep it all from melting away in minutes. This recipe fixes that problem by giving you the look of an ice cream cone with the durability of a cookie! If you’re looking for an easy and unique party dessert recipe, then you have to try these delicious Ice Cream Cone Cookies!
This recipe was created for A Cultivated Nest by Kari S.
Ice Cream Cone Cookies
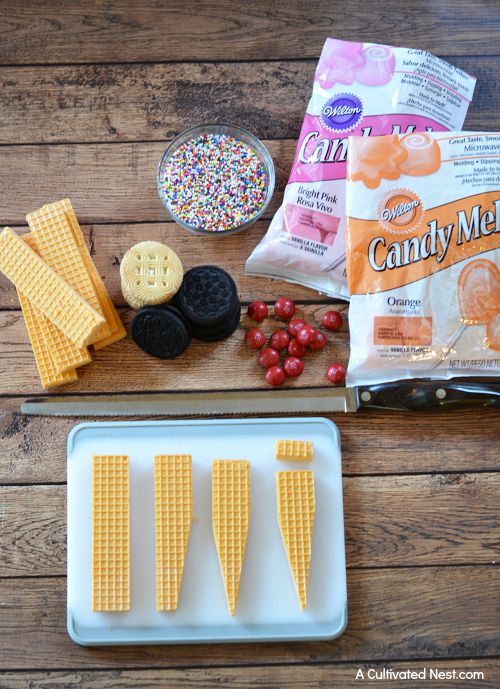
Ingredients:
Chocolate Sandwich Cookies
Vanilla Sandwich Cookies
Sugar Wafers (orange color)
Candy Melts* -white, pink and orange.
Chocolate Jimmie Sprinkles
Rainbow Sprinkles
Red M&Ms – I only had peanut butter m&ms and they worked great!
*I didn’t have any white candy melts on hand, therefore I used 1/4 cup powdered sugar and 1/2 teaspoon water. You want this very thick, otherwise it will run off your chocolate cookie. You can also use any other colored candy melt since it’s completely covered with rainbow sprinkles.
Disclosure: This post may contain affiliate links to Amazon and/or Etsy, which means that I may earn a small commission from some of the links in this post. Please see our Disclosure Page for more information.
Directions:
1. Using a bread knife, cut sugar wafers on a cutting board. Use gentle pressure and a sawing motion. You may need to cut the ends if your wafer cookies are extra long. Place a sandwich cookie on them to be sure.
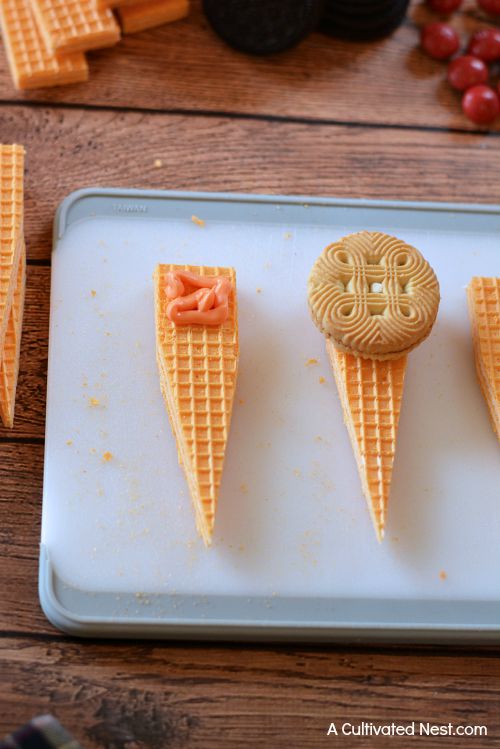
2. Microwave orange candy melts in a ziplock bag and cut the tip. Squeeze onto the sugar wafers and press one cookie on top. Repeat for the rest of the cone shaped wafers and cookies.
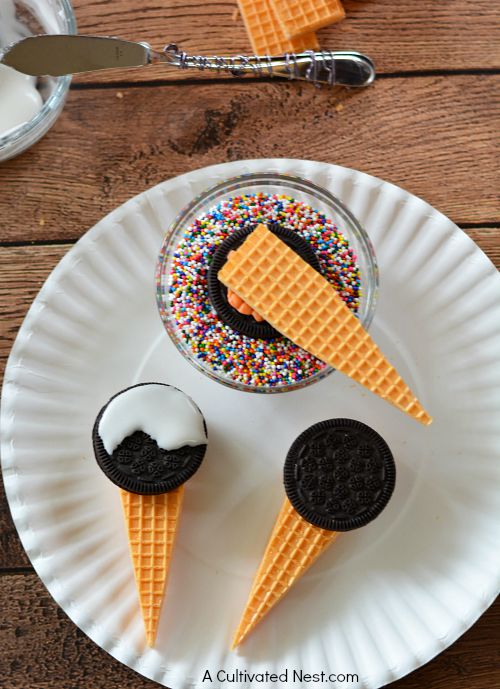
3. Microwave white candy melts in a ziplock bag and cut the tip. Squeeze onto the chocolate cookies and press each cookie into the rainbow sprinkles. *If using powdered sugar icing recipe, use a knife to spread the icing onto the cookie. If it runs off, your icing is too thin. Add 1 teaspoon of powdered sugar at a time to get it nice a thick.
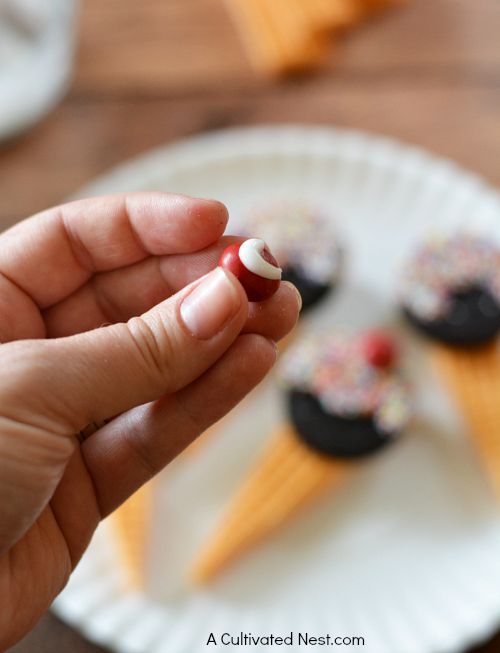
4. Use a dollop of candy melts on the back of an M&M and attach to the chocolate cookies. Set aside.
5. Microwave pink candy melts in a ziplock bag and cut the tip. Squeeze onto the vanilla cookies and press an M&M into the pink candy melts. Sprinkle with chocolate jimmies.
6. Set aside to harden.
Store the finished cookies in an airtight container. These will get stale if there’s enough humidity or if they are left out. You can always toss the container in the fridge.
Print
Ice Cream Cone Cookies
- Category: Dessert
Description
These easy ice cream cone cookies are delicious and won’t melt away!
Ingredients
- Chocolate Sandwich Cookies
- Vanilla Sandwich Cookies
- Sugar Wafers (orange color)
- Candy Melts* -white, pink and orange. *I didn’t have any white candy melts on hand, therefore I used 1/4 cup powdered sugar and 1/2 teaspoon water. You want this very thick, otherwise it will run off your chocolate cookie. You can also use any other colored candy melt since it’s completely covered with rainbow sprinkles.
- Chocolate Jimmie Sprinkles
- Rainbow Sprinkles
- Red M&Ms – I only had peanut butter m&ms and they worked great!
Instructions
- Using a bread knife, cut sugar wafers on a cutting board. Use gentle pressure and a sawing motion. You may need to cut the ends if your wafer cookies are extra long. Place a sandwich cookie on them to be sure.
- Microwave orange candy melts in a ziplock bag and cut the tip. Squeeze onto the sugar wafers and press one cookie on top. Repeat for the rest of the cone shaped wafers and cookies.
- Microwave white candy melts in a ziplock bag and cut the tip. Squeeze onto the chocolate cookies and press each cookie into the rainbow sprinkles. *If using powdered sugar icing recipe, use a knife to spread the icing onto the cookie. If it runs off, your icing is too thin. Add 1 teaspoon of powdered sugar at a time to get it nice a thick.
- Use a dollop of candy melts on the back of an M&M and attach to the chocolate cookies. Set aside.
- Microwave pink candy melts in a ziplock bag and cut the tip. Squeeze onto the vanilla cookies and press an M&M into the pink candy melts. Sprinkle with chocolate jimmies.
- Set aside to harden.
About Kari:
Kari is a Mom, Wife, Dog Lover, Graphic Designer, Chocolate Lover and Fearless Baker.
You may also be interested in:
