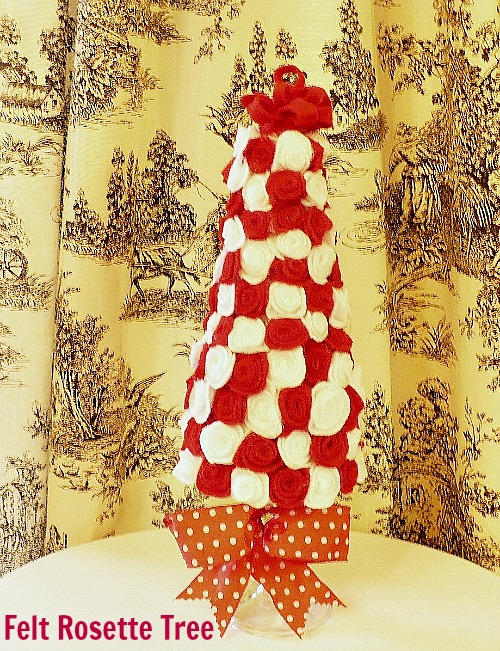
Hi everyone! In keeping with my tree theme for Christmas, I’d like to show you a felt rosette tree that I made using a Styrofoam cone and red and white felt.
How to make rosettes:
I made little rosettes out of the felt and hot glued them to the cone. Here’s how:
Disclosure: This post may contain affiliate links to Amazon and/or Etsy, which means that I may earn a small commission from some of the links in this post. Please see our Disclosure Page for more information.
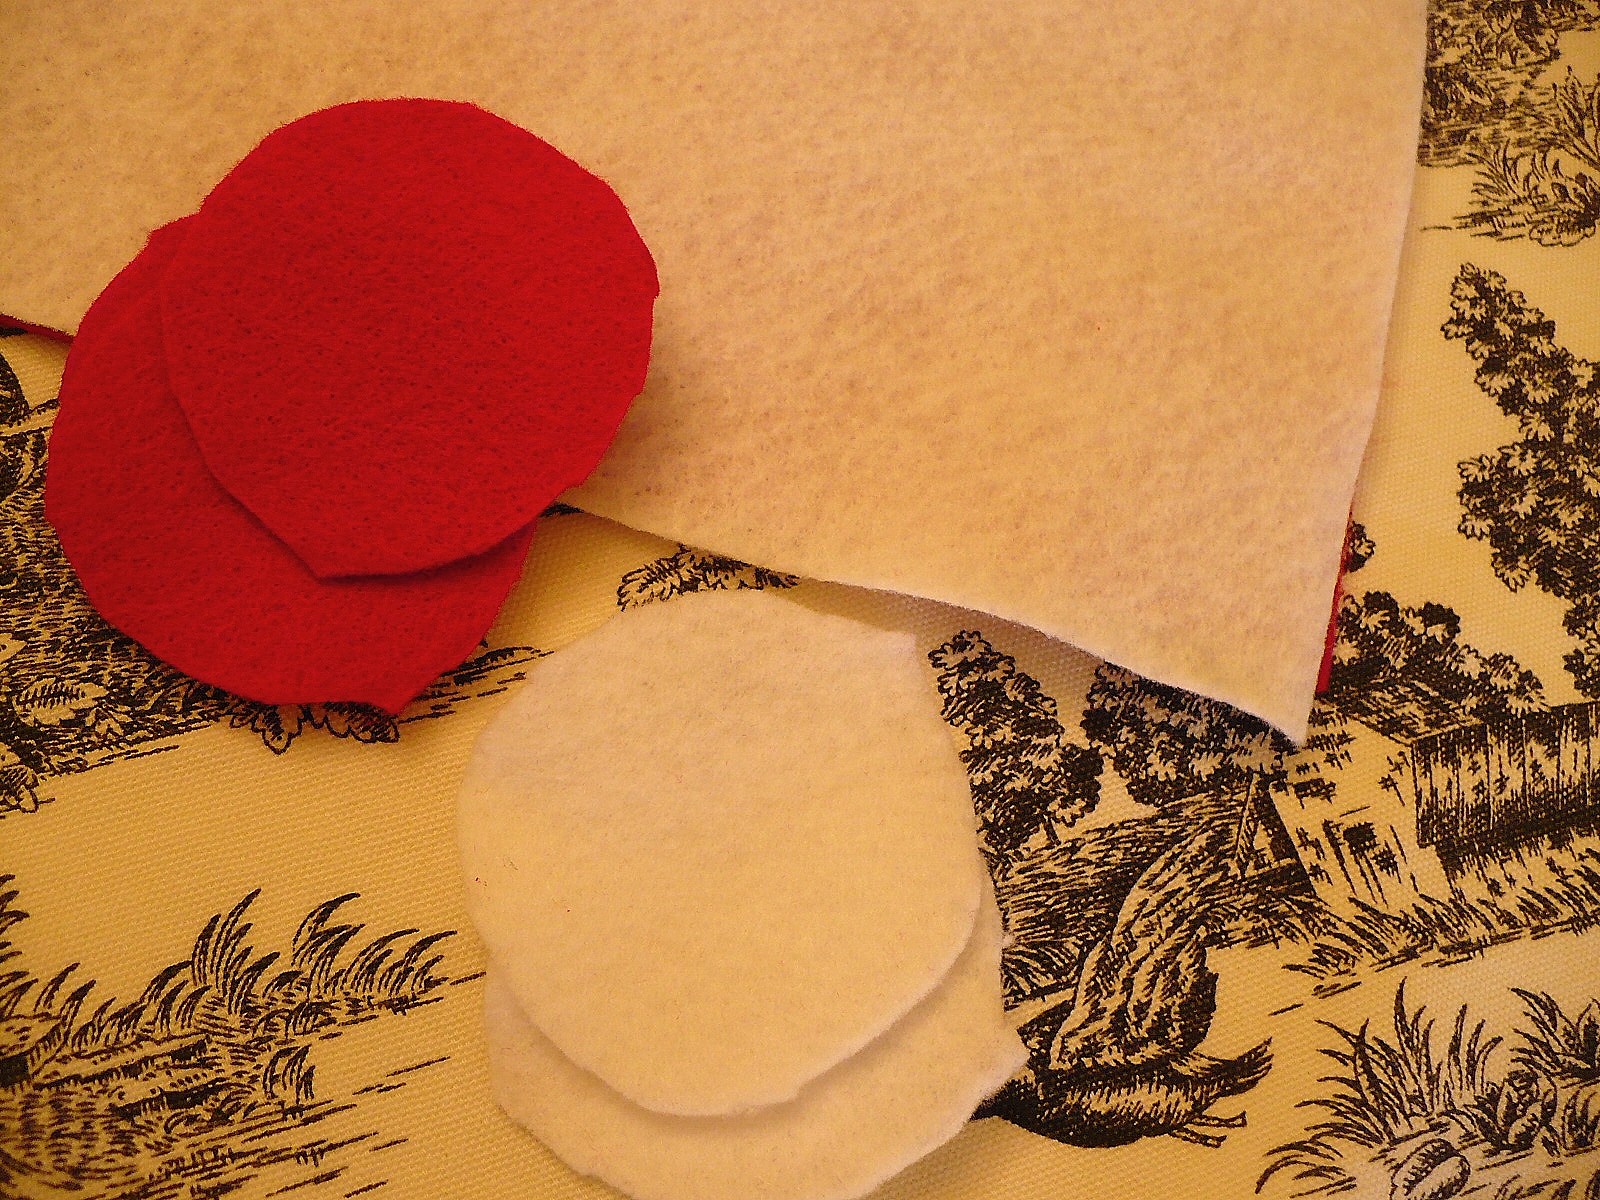
1. I cut circles out of the felt squares I got at Michaels (they’re 4/$1 and I got 4 red and 4 white squares and had just enough to do this size cone).
2. Then I cut the circle into a corkscrew (just keep turning the felt circle in your hand and it will naturally do it).

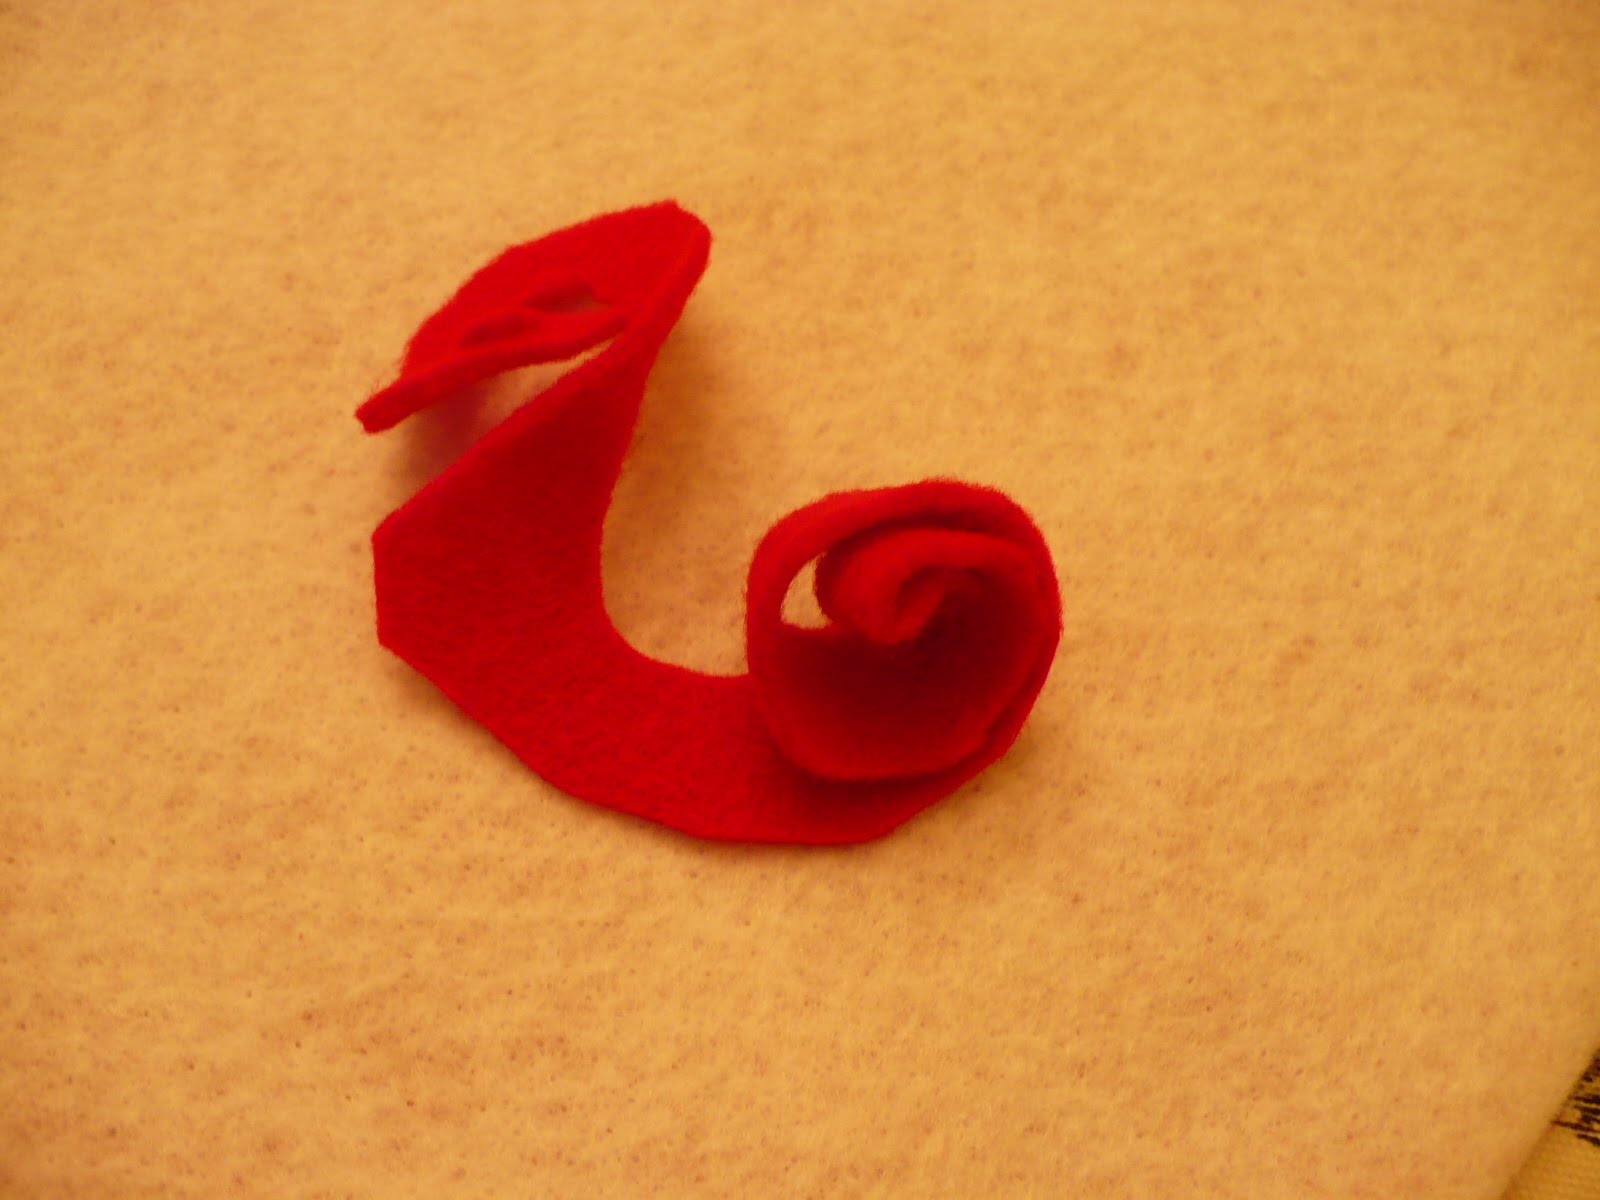
3. It should look like this when you’re done.
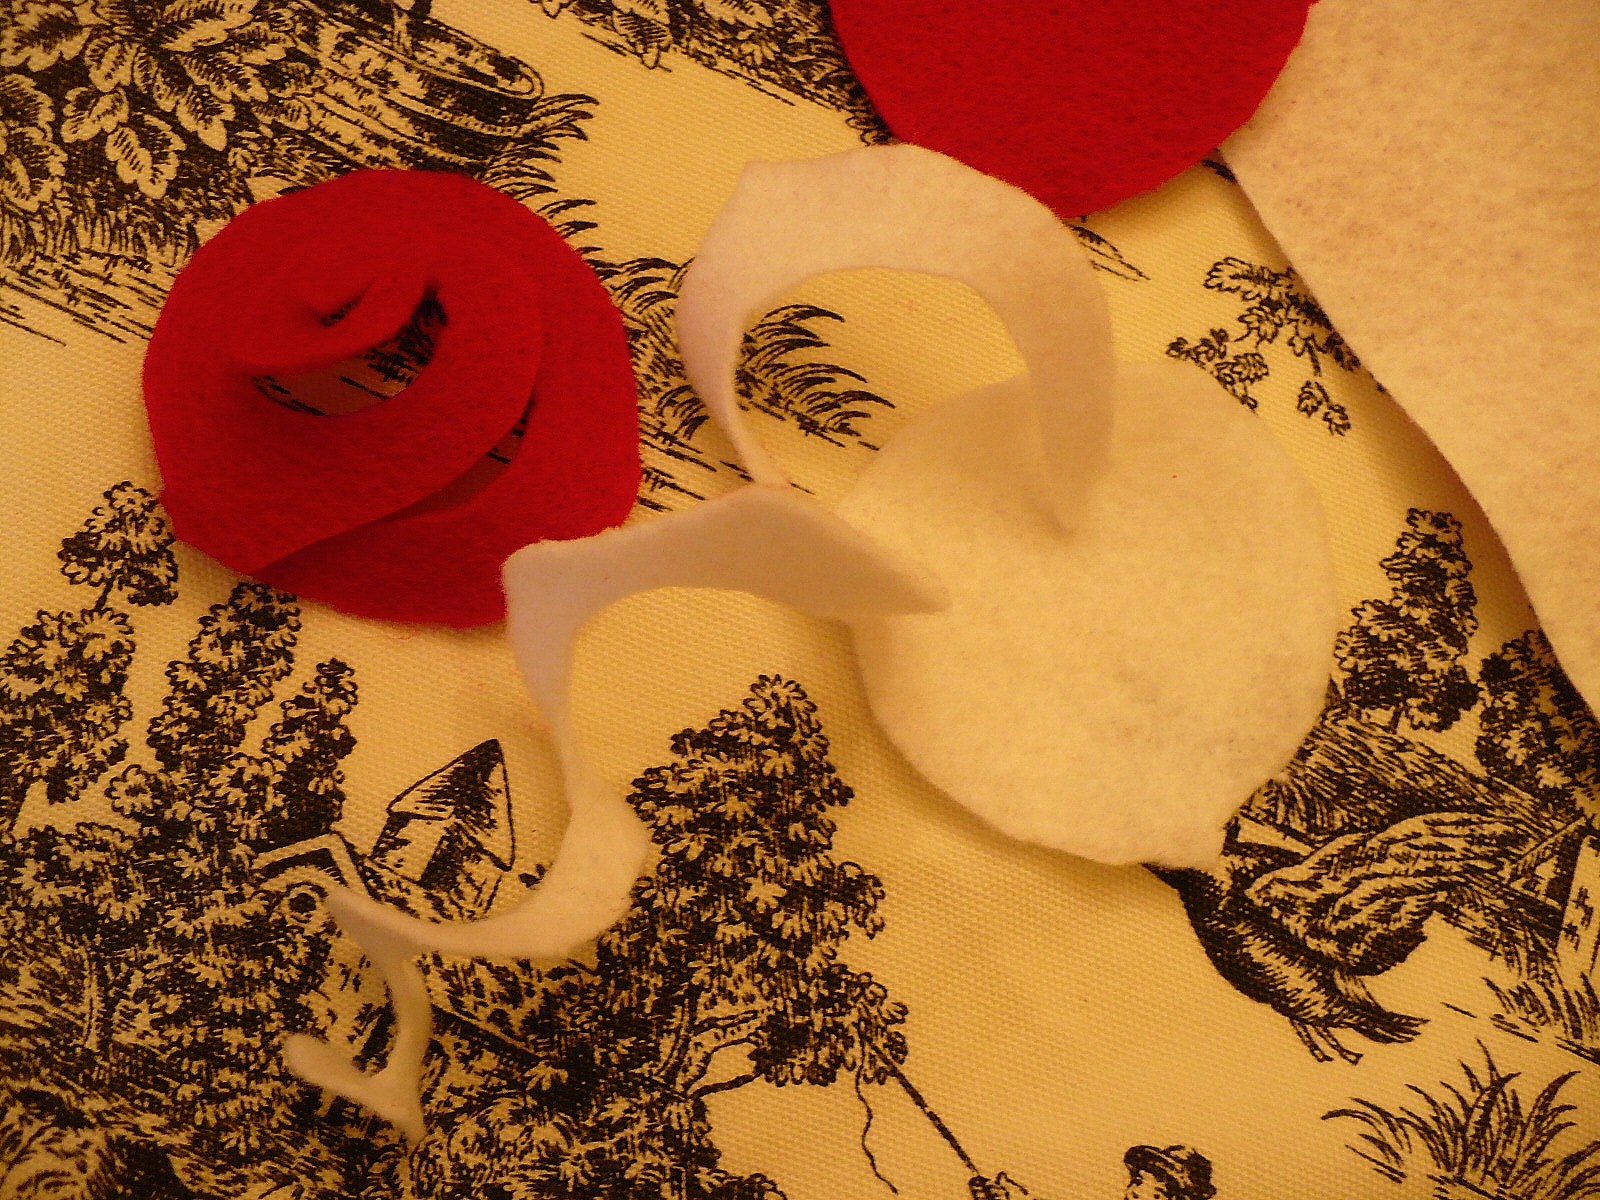
4. Next you start rolling it, starting with the end where you made your first cut. As you roll it you’ll see that it starts to resemble a rose! You can make it tight or loose – play with it until you’re happy with your rosette.
5. When you have a bunch made you can start attaching them to the cone. I used hot glue on the low setting.

This is a really easy project but it does take some time. I cut out circles while watching a movie. I made the rosettes and glued them on as I had time. I worked on this tree for about 4 days – a little bit here and there. This is a good family project too. Kids can cut the circles – they don’t have to be perfect!
 I sat it on a glass candlestick and attached a bow (everything always looks better to me with a bow)!

Here are two other trees I made a few years ago. This first one is just one of those $1.99 beaded garlands wrapped around a cone (I used hot glue).

The next one I made out of vintage buttons – some that still have the string in them!

You can find the Styrofoam cones in any craft store and the dollar stores usually carry them too. Although my Dollar Tree was all out the day I checked (of course). Next week I’ll have a few more trees to share!
Have a great week everyone and thanks for stopping by! **Judi emailed me to say that she found the package of 21 bottle brush trees at Home Depot for $5.97 which is way cheaper than at Michael’s – so check there if you’re looking for some to dye.
I love that! What a sweet idea!
You creative girl, you! That is very cute!
Suzanne
Those roses are really cute & so is the tree! I saw those roses made the same way out of paper the other day but I like the felt much better. 🙂
What is it about roses? Such a lovely and simple idea…and great execution!
I loved all of your beautifully crafted trees! Fun! Kerrie
I think I could handle the beaded garland tree ~ time and patience wise. I love your felt rosette one!
Oh, I love all your cute little trees! You have really been working on them and each is so cute! Have a great holiday!
Manuela,
These are adorable! I wish you were my neighbor and I could dash to see what you are doing next! You are so clever!
I love the roses…..
Those are some cute little trees! I agree with what Matty said, I wish you were my neighbor too 😉
Thanks for more inspiration. My Bottle-brush tree project is progressing. All 21 are bleached and are drying. Looking good!! Sally
love them! very cute 🙂
All three trees are very cute. That rose one is amazing! They really do look like roses. Great job on all three trees!
Nancy
Great ideas! I am thinking of doing one with buttons too and one with peppermint candy and then spraying with acrylic to protect it. I love all of yours.
Debbie
Oh how pretty that turned out! You are brilliant! I love all of the trees you made. laurie
Very pretty, Manuela!
What a cute little tree!
Ally
Love your new header.
These trees are so cute. Love them!
Hugs,
Lee Laurie
Once again Manuela delivers! You continue to inspire me with your creations. I am going to have to make a few of these trees, they are just darling! Love the affect.
I wish I was your neighbor too!
On a very personal note, when I saw your vintage button tree, it brought back a memory of my dear mother making trees and wreaths of vintage buttons with bows made from old news paper she had twisted and fashioned into a bow. She has been gone for six years now, I miss her so much, but this was like having her near me again!
Thank you….
Thanks for showing us how you made it! Very cute…love the rosettes and I always wondered how to make them!
So beautiful!
Great tutorial and looks like even I could tackle that! Thanks too for the tip about Home Depot. I'm so excited to start Christmas decorating/crafting/baking!!!
What a wonderful "rose" tree! I love a red and white color scheme.
Glad you entered the give away on my blog! Good luck!
I love your ideas. I am so behind decorating for Christmas this year. 🙁
So simple and cute…wouldn't they make get hostess gifts for holiday parties!
Cute trees Manuela!
Happy Thanksgiving!
Rosemary
Very cute Manuela! Love those rosettes. Wouldn't they be cute on a package or on a hairbow? I might have to try that out. Mimi
That is beyond precious! 🙂
Happy Thanksgiving to you and your family Manuela!
You are very creative Manuela! Those rosettes are lovely…well done! 🙂
Blessings,
Camille
How pretty! I really like the one with buttons also. I am still digging in boxes to see what I want to use this year, but sorta slowed down. Pulled a muscle in my leg and ended up at the Dr. today 🙁
Thanks for visiting.
I love this! Great rosette tutorial!
That is just the sweetest thing! I love it!
XOX
Jen
sweet trees.
the one with the roses is really pretty and unique.
barbara jean
Love the roses! And you're right, they do look easy to do! And the button tree is very nice as well! Thanks for your comment on my blog yesterday!! Enjoy your week!
Love the tree's I especially love the button one…. but then I would!
Thanks for showing how to make the rosettes! I'm going to make some to use on a shirt. 🙂
Totally in love with the button tree! The rosettes are adorable!
What a SWEET Christmas decoration.
And I love the button tree, too!
Thanks for sharing the process and sources.
Oh my gosh, those are adorable!! I have some red felt somewhere. I just may have to try this. 🙂 You can find small squares of felt at Walmart for around 37 cents a square. 🙂
Many Thanksgiving Blessings to you and your family….Hugs and smiles Gl♥ria
Those are so cute. I love the button tree. Linda
I'm so making a tree! What a great project!!
That is adorable! What a creative mind you have..
Hugs,
Penny
Great tutorial! The button tree is my favorite though! Happy Thanksgiving!
You are so clever! Love those trees! Red and white (which you know I adore) and buttons (which I also adore!) Can't wait to see what you come up with next. Have a wonderful Thanksgiving!
Brenda
Hi Manuela….stopping by to wish you and your family a very Happy Thanksgiving….my favorite tree the button one…it is adorable….Sue
So, I love the rosette tree! You never cease to amaze me at the creative things you come up with. I really want to try this, and hope to find a bit of time over this holiday weekend.
Wishing you and you family a lovely Thanksgiving holiday!
xo, Jennifer
That's so cute! Great mind must think alike because I have been thinking about doing a wreath out of rosettes! It look wonderful and cheery!
Truely adorable Manuela! I hope you have a wonderful Thanksgiving:>)
What a sweet and simple idea! Thank you!
Happy Thanksgiving to you and yours!
your canadian neighbour xx
What a creative idea! Just perfect with your red & white accessories as well.
Ok…you seriously need your own show so you can teach us all how to be like you!!
Have a wonderful Thanksgiving!
Laura
Manuela, The rosette tree is just so sweet! The beaded garland tree gives such a nice look and how easy to just wrap around a cone!
Thanks so much for coming 'round while I've been a bit looney. Each day I see a little more of a progression- just have to make sure not to rush it too much- I pay for it the next day. Thanks for the info on the bottle brush trees, too. I want to do something w/them soon. Hope your Turkey Day was a good one!
hugs, Sue
Oh Manuela these trees are wonderful. I really love the rose one. Can not wait to see more of what you are up to xoxo Clarice