Fun Fall Pumpkin DIY Project.
Today I have a fun fall DIY project contributed by Jody Smith! Ready to bring some vibrant fall flair to your porch this season? These Colorful DIY Wooden Pumpkins are the perfect way to add a rustic, handcrafted touch to your outdoor decor! Not only are they super simple to make, but with a few materials and a splash of spray paint, you can customize them to suit any style. Whether you’re working with leftover wood or picking up a few supplies, this budget-friendly project will leave you with beautiful, reusable porch decor you can enjoy year after year.
Disclosure: This post may contain affiliate links to Amazon and/or Etsy, which means that I may earn a small commission from some of the links in this post. Please see our Disclosure Page for more information.
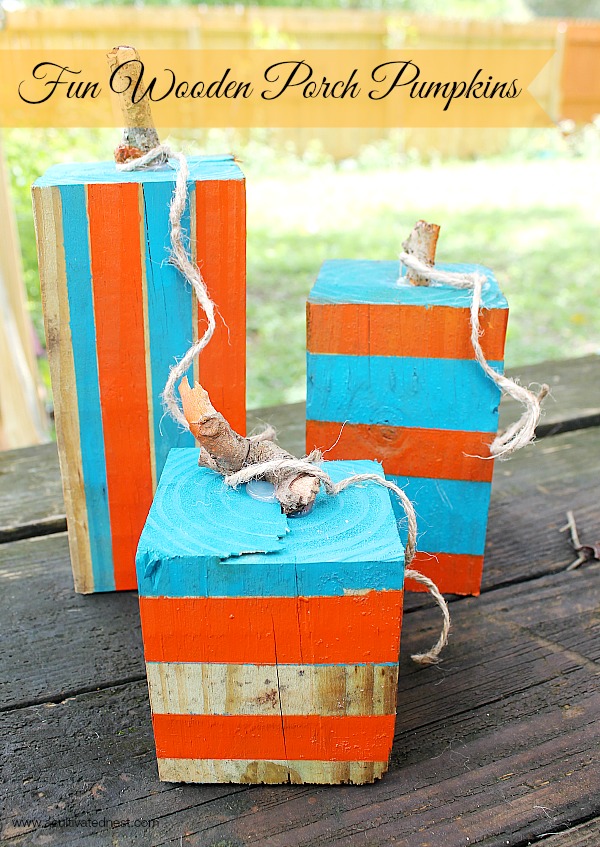
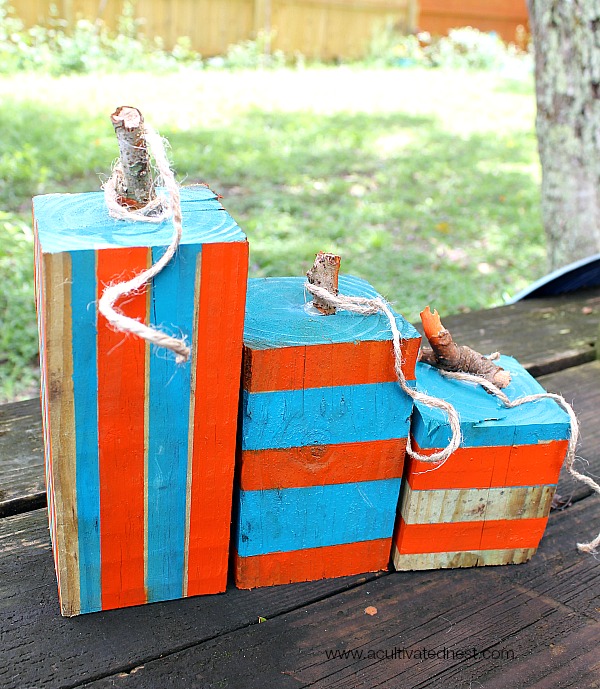
4×4’s make a lovely rustic decoration for your porch, or inside on a table! You can leave them plain but a little bit of color really makes them pop and adds interest. Simply use painters tape and spray paint to create stripes for a pretty pattern, I varied the stripes on all 3 for a just a little bit more funky style. If you happen to have 4×4’s laying around and spray paint in the garage this project will be totally free!
Otherwise you can still get it done for under $10, not bad for porch decor that can be used year after year and customized to match your indoor or outdoor style.
Colorful DIY Wooden Porch Pumpkins
This DIY wood pumpkin project is very easy! Here’s what you need to do:
Supplies Needed:
4×4’s
orange spray paint
teal spray paint
painters tape
1-2” diameter limbs
sisal rope
newspaper
saw (or ask Home Depot to cut for you)
hot glue gun/glue sticks
Directions:
1. Cut 4×4’s to desired size, a good scale is 4”, 6”, and 8” or have Home Depot do it for you if you don’t have a saw.
2.Tape off your pattern- simple stripes or criss cross your tape all for a checker board pattern. Be sure to press the painters tape firmly into wood to get a crisp paint line.
3. Spray paint a light tack coat on wood with your accent color choice, top and sides. Allow to dry 5 minutes, add 1-2 more coats until your desired shade is reached. Dry paint for 1 hour.
4. Cover painted areas with painters tape again, pressing down firmly and paint primary color- using 2-3 coats until you are happy with coverage.
5. After final coat let paint dry for 3-4 hours before adding accents.
6. For a more rustic touch break limbs by hand into pieces approximately 3” long.
7. Hot glue “stems” to the top center of wood. hold in place for a minute until glue is hardened.
8. Wrap sisal string around stem and let it coil down the side, trim to desired length or add your favorite fall ribbon and faux leaves.
9. To make your pumpkins last longer, you can spray them with an additional 2 coats of clear polyurethane spray.
These are easy to make and easy to dress up for fall, Halloween and Thanksgiving!

You might also be interested in:

Those are precious:) Enjoy this beautiful FALL day dear friend, HUGS!
Those are really cute! So simple, too. I’ll bet if you had some scraps left over they would work.
These are a fabulous way to use scrap pieces of wood! They look adorable!