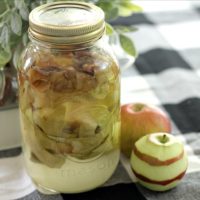
Ingredients
- Organic apple peels, cores, and pieces (obviously you could use conventional apples, but know that rinsing them with water won’t get all the pesticides off)
- Filtered water (we used water from our Brita pitcher)
- White granulated sugar
- Quart Mason jar with lid and ring
- Extra Mason jar lid
- Cheesecloth
Instructions
- Begin by filling your jar with your apple peels, cores, and pieces. If you just have few, use them and add apple skins and cores daily as you get them.
- Stir 1 T. granulated sugar into filtered water.
- Pour the sugar water over the top of your apple pieces until they are covered completely. Add water each time you add apples. You want to keep your apple pieces down below the waterline to prevent mold, so add something to weigh them down. I simply used a lid from a smaller Mason jar to help keep them down.
- Cover the top of your jar with cheesecloth and place the ring on the neck of the jar.
- Place the jar in a cool dark place, and make a note of the date on the jar or somewhere else. A printable label could help with this.
- Stir once a day with a wooden or plastic spoon. Your apples will eventually settle closer to the bottom, and then you’ll no longer need to stir.
- After a few days you might notice your mixture is bubbling, this is good!
- Within a week the “mother” will form, a whitish foam on top. This is the vinegar fermenting as it should. Once it ferments you don’t want to add any more scraps, just start a new jar.
- About a month after you started it your vinegar should be ready, give it a little taste to test the strength and make sure it is as you like it.
- Strain the liquid out, preserving or removing the mother if you like, then toss the scraps out (or add them to your compost pile).
- Store in a cool dry place, your vinegar will last for years.