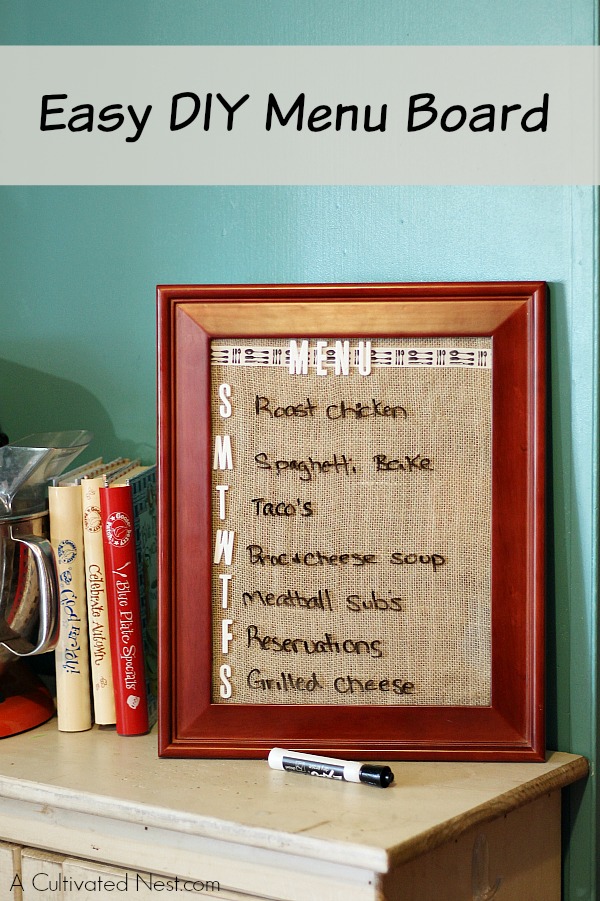
Yard sale and thrift store finds are some of the greatest treasures! Not only are you rescuing items from possibly being in the trash pile but you will often find good quality for way less than you might pay for a new, plastic, and not as well made item! Have you ever run across old fashioned pictures that your parents had hanging in the living room in the 70’s at thrift stores? They may be out of date but I bet the frames around them are as solid as can be. While the frame I upcycled for my DIY menu planning board is just a regular photo frame I found at a yard sale, the same process can be applied to those by simply removing old prints and cleaning up (or even painting the frame).
Disclosure: This post may contain affiliate links to Amazon and/or Etsy, which means that I may earn a small commission from some of the links in this post. Please see our Disclosure Page for more information.
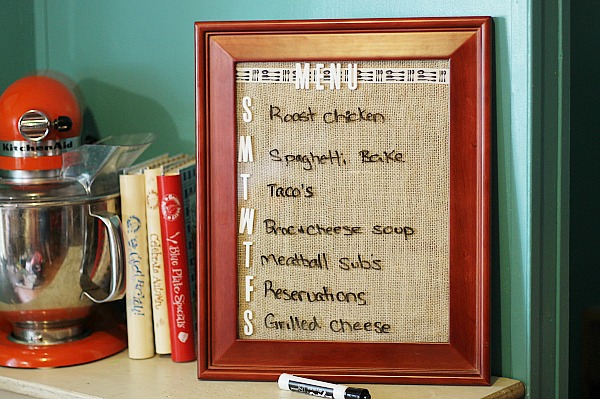
Get fancy and use a more ornate frame or keep it sleek and simple like I did! I had fun turning this frame into a dry erase menu board to match my kitchen by adding some burlap inside for texture and a few pretty embellishments from the scrapbook aisle at the craft store.
DIY Menu Planning Board
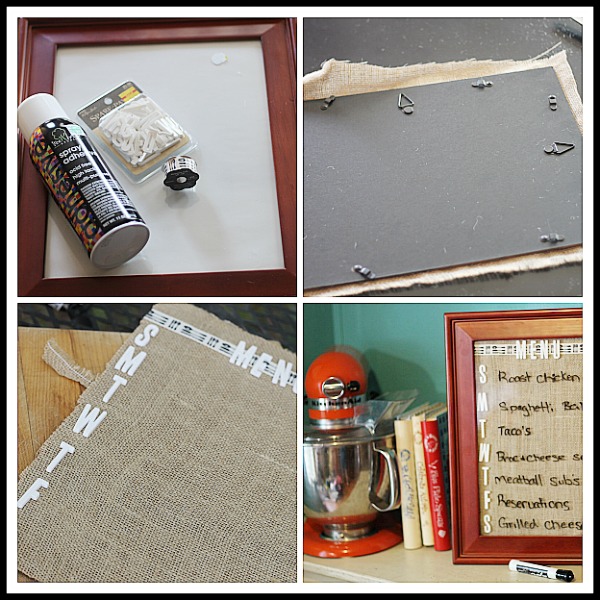
Materials:
Frame w/ glass and backing
Alpha scrapbook stickers
burlap, other fabric or scrapbook paper
spray adhesive
scissors
(optional) patterned ribbon
Directions:
1. Remove glass and backing from frame.
2. Cut fabric about ½” larger than frame all the way around.
3. Spray inside of frame backing and the backside of burlap/fabric with adhesive generously and press firmly, smoothing and adjusting fabric as needed till smooth. Spray adhesive is pretty forgiving and you will have about a minute of work time to get it right.
4. Next -spray the back of your ribbon and smooth it into place.
5. Then choose your alpha letters to finish off your menu board and arrange them to decide where you want them. Once you are happy with the placement turn them over on a piece of paper and spray the backs with adhesive. press them firmly into place.
6. Trim fabric and ribbon accent even with the edges all the way around, removing as much excess as possible so that it fits inside frame better.
7. Replace the glass and backing into your frame, give it a quick windex and your ready to plan out a weeks worth of meals!
Oh, be sure you glue your fabric and accents on so that the hook on the backing of your frame is up… I speak from experience here, I had to rip mine apart and redo it. The good news is I learned that even dry spray adhesive is forgiving and still not permanent!
Write on the glass with a dry erase marker so you can wipe it clean each week. This is a great way to keep your meal planning organized and now everyone will know what’s on the menu for the week!
This would make a cute present!
This post contains affiliate links to Amazon, which means that I may earn a small commission from some of the links in this post. Please see our Disclosure Page for more information.
About Jody: I am a Florida girl through and through living the semi-country, small town life. I am making my way through it with my amazing hubby, 2 beautiful kids, 2 of the best Dachshunds to ever walk the face of the earth, massive amounts of coffee and a whole lot of Jesus. I homeschool, craft, cook, scrapbook, garden, raid the thrift shops, snap 1,000’s of photos, and read when I can grab a spare minute (which is rare). You can find me blogging at Simply Southern Sunshine.
You Might Also Be Interested In These Posts:
GREAT idea:) Love it! Thanks for inspiring me to create today:) HUGS!
This is so needed in my house – we’re constantly askin geach othe rwhat we’d planned to eat for dinner. I love that this looks simple enough for my hands which aren’t ask steady and skilled as my eyes wish they were sometimes!
I have a menu board as well. But I made mine from a dollar store silver tray and chalkboard paint. I love this idea too, Thank you for linking up at #HomeMattersParty this week. I hope you will come back next week to link up again.