Show your love by giving your valentine a plate of crunchy chocolate cookies with raspberry liqueur icing this Valentine’s Day! These cookies are almost too pretty to eat, but really, how could anyone resist? These treats are for adults, of course, but there are instructions below for a non-alcoholic version, too. Here’s how to make some gorgeous (and delicious) Chocolate Heart Cookies with Raspberry Liqueur Icing!

Disclosure: This post may contain affiliate links to Amazon and/or Etsy, which means that I may earn a small commission from some of the links in this post. Please see our Disclosure Page for more information.
This simple cookie dough doesn’t need to be chilled – just mix, roll, and bake. The icing decorations will take a little more patience, but are worth every minute you spend; they take the cookies to the next level!
Chocolate Heart Cookies with Raspberry Liqueur Icing
Makes 3 1/2 dozen 2-inch hearts
Cookie Ingredients
1 cup (2 sticks) butter, softened
1 cup sugar
1 teaspoon vanilla extract
1 tablespoon brewed coffee (or water)
1 egg
2 1/4 cups all-purpose flour
2/3 cup unsweetened cocoa (natural or Dutch-process)
1/4 teaspoon salt
1/4 teaspoon baking powder
1/4 teaspoon baking soda
Cookie Directions
1. Heat oven to 350 F. Cover baking sheets with parchment.
2. In a large bowl (a sturdy stand mixer is recommended), beat the butter and sugar together well, scraping the sides of the bowl often.
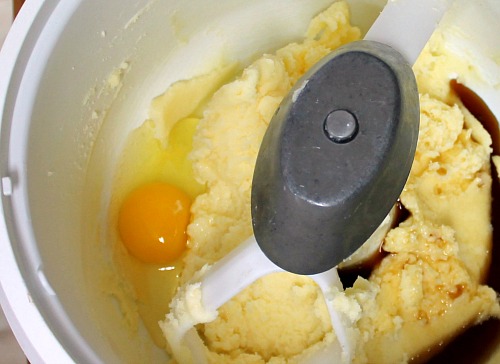
3. Add vanilla, coffee (or water), and egg and beat until combined.
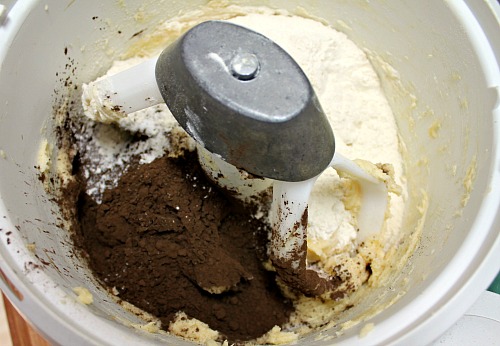
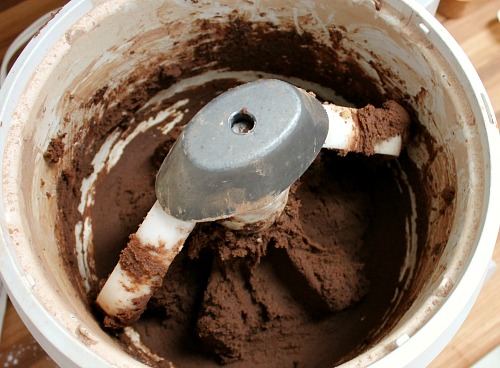
4. Add flour, cocoa, salt, baking powder, and baking soda. Mix together until all dry ingredients are incorporated.
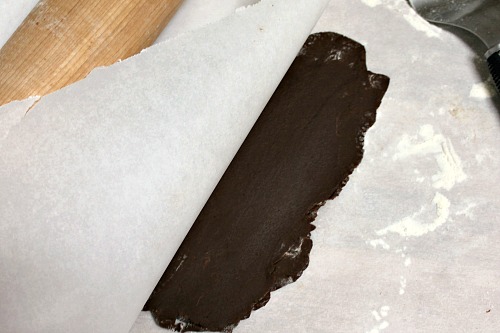
5. Working with 1/4 of the dough at a time, place dough on a large piece of floured parchment. Sprinkle the dough with flour and cover with a second piece of parchment. Roll thin – less than 1/4-inch.
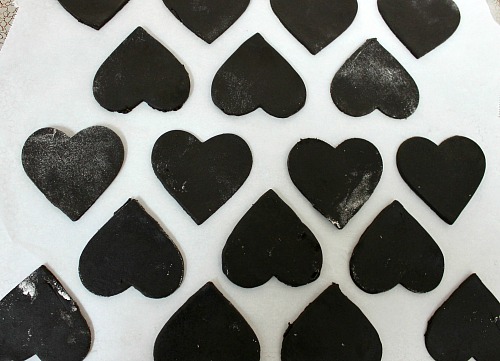
6. Using a cookie cutter, cut out heart shapes and place 1/2 inch apart on prepared baking sheets.
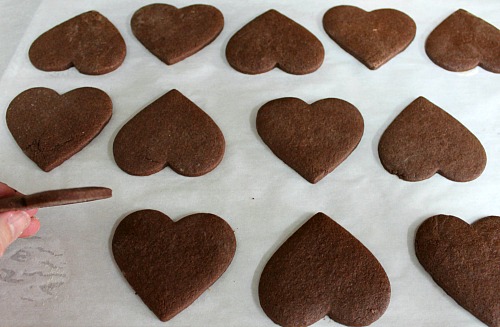
7. Bake for approximately 12 minutes. The cookies may feel slightly soft, but the edges should be starting to get a little crisp. Move to rack; cookies will harden as they cool.
8. Dough scraps may be re-rolled between parchment sheets to make more chocolate heart cookies!
Icing Ingredients
5 cups powdered sugar
1/4 cup meringue powder
1/4 cup warm water
1/4 cup raspberry liqueur- I used Chambord raspberry liqueur (To make this non-alcoholic, substitute water and 1 teaspoon raspberry flavoring for the liqueur)
Red or pink food coloring
Water or additional liqueur, as desired, to bring the icing to proper consistency
Toothpicks
3 pastry bags (or plastic freezer bags)
Optional- A small rose petal piping tip – I used Wilton tip #104 (to create the ruffles)
Icing Directions
1. In a large bowl, combine the powdered sugar and meringue powder. With mixer running, slowly add the warm water and liqueur.
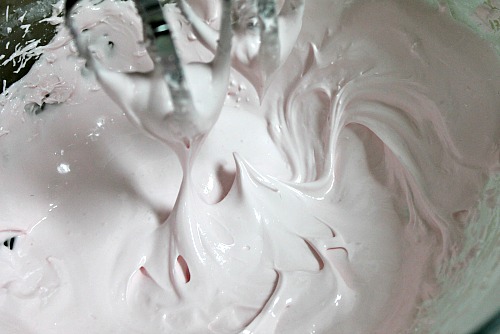
2. Beat on medium-high speed for at least 5 minutes. Because the consistency is slightly thin, the icing won’t come to a stiff peak, but should be light and smooth.
3. Remove 1 cup of icing and place it in a small bowl. Add a tiny bit of food coloring (use the tip of a toothpick to dip in coloring) to bring the icing to a very pale pink color. This icing needs to be a fairly thick, because you will be using it to outline the cookies and add ruffles. It should drop from the spoon but hold its shape when dropped into the bowl. If it’s too thick to pipe from a bag, add a little liqueur (or water), a few drops at a time. If it’s too thin, add a little powdered sugar and mix well.
4. To the icing in the original large bowl, add liqueur (or water) 1/2 teaspoon at a time, until mixture flows from the spoon and blends into the icing in the bowl within seconds. It needs to flow, but shouldn’t be watery (picture the thickness of molasses or corn syrup). Add enough food coloring to create a deep pink color.
5. Place half of the thicker, light-colored icing into a disposable pastry bag or freezer-type plastic zipper bag. Cut a small piece of the tip off and test by squeezing a small amount out. The outline works as a dam to hold in the thinner icing, so the tip needs to be large enough to make a sturdy line of icing around the cookie.
6. The thin dark pink icing also goes in a bag with a little larger piece of the tip cut off to allow the icing to flow easily. Only put as much in the bag as you can handle to avoid mess. Cover the remaining icing in the bowl.
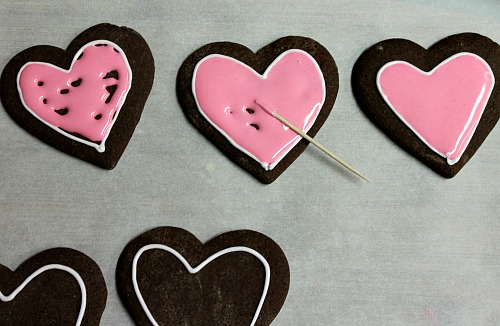
7. With the light pink icing, squeeze a line all the way around the edge of a cooled chocolate heart cookie, approximately 1/4-inch from the edge, leaving room for decorative ruffles. You can do one cookie at a time, or do all of the edges at once.
8. With the thin dark pink icing, fill in the cookie, using a toothpick to fill in any holes and bring the icing all the way to the piped outline. Tap gently to settle the icing. (Note: if you have time, allow the cookies to dry for a few hours before moving to the next step.)
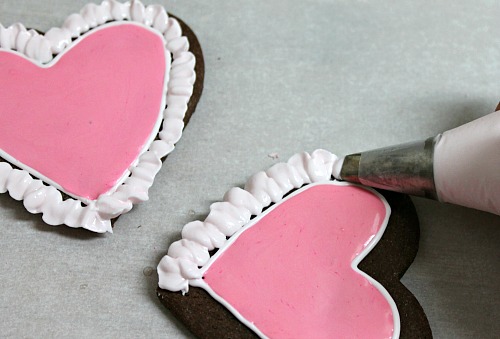
9. After all chocolate heart cookies are outlined and filled, put the remaining light pink icing in a pastry bag with a small rose petal tip. With the thick side of the tip opening facing the outline, work your way around the cookie, moving the tip in and out slightly while squeezing, just outside the outline. (If you don’t have a rose petal tip, simply pipe dots all the way around.)
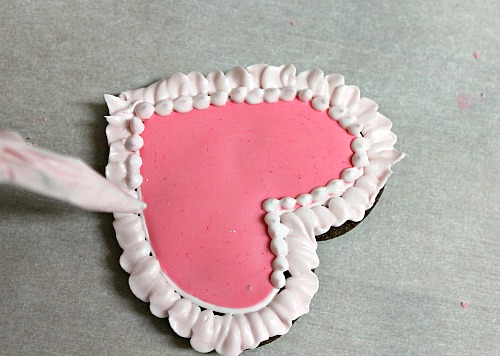
10. Go around the outline at the base of the ruffles, making small dots, using the leftover outline icing.
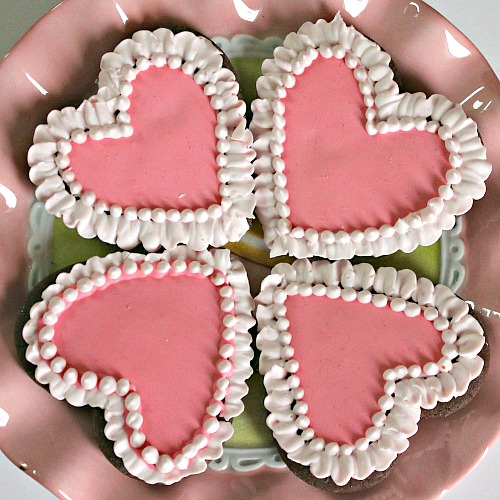
11. Allow the cookies to dry undisturbed for at least 6 hours. Then gift and enjoy!
This may sound like a lot of work just for some icing, but trust me, the end result is fabulous! These chocolate heart cookies will make your Valentine’s so special!
Have you ever done fancy icing on a dessert before?


Chocolate Heart Cookies with Raspberry Liqueur Icing
Ingredients
Cookie Ingredients
- 1 cup (2 sticks) butter, softened
- 1 cup sugar
- 1 teaspoon vanilla extract
- 1 tablespoon brewed coffee (or water)
- 1 egg
- 2 1/4 cups all-purpose flour
- 2/3 cup unsweetened cocoa (natural or Dutch-process)
- 1/4 teaspoon salt
- 1/4 teaspoon baking powder
- 1/4 teaspoon baking soda
- 2″ heart cookie cutter
Icing Ingredients
- 5 cups powdered sugar
- 1/4 cup meringue powder
- 1/4 cup warm water
- 1/4 cup raspberry liqueur- I used Chambord raspberry liqueur (To make this non-alcoholic, substitute water and 1 teaspoon raspberry flavoring for the liqueur)
- Red or pink food coloring
- Water or additional liqueur, as desired, to bring the icing to proper consistency
- Toothpicks
- 3 pastry bags (or plastic freezer bags)
- Optional- A small rose petal piping tip – I used Wilton tip #104 (to create the ruffles)
Instructions
Cookie Directions
- Heat oven to 350 F. Cover baking sheets with parchment.
- In a large bowl (a sturdy stand mixer is recommended), beat the butter and sugar together well, scraping the sides of the bowl often.
- Add vanilla, coffee (or water), and egg and beat until combined.
- Add flour, cocoa, salt, baking powder, and baking soda. Mix together until all dry ingredients are incorporated.
- Working with 1/4 of the dough at a time, place dough on a large piece of floured parchment. Sprinkle the dough with flour and cover with a second piece of parchment. Roll thin – less than 1/4-inch.
- Using a cookie cutter, cut out heart shapes and place 1/2 inch apart on prepared baking sheets.
- Bake for approximately 12 minutes. The cookies may feel slightly soft, but the edges should be starting to get a little crisp. Move to rack; cookies will harden as they cool.
- Dough scraps may be re-rolled between parchment sheets to make more chocolate heart cookies!
Icing Directions
- In a large bowl, combine the powdered sugar and meringue powder. With mixer running, slowly add the warm water and liqueur.
- Beat on medium-high speed for at least 5 minutes. Because the consistency is slightly thin, the icing won’t come to a stiff peak, but should be light and smooth.
- Remove 1 cup of icing and place it in a small bowl. Add a tiny bit of food coloring (use the tip of a toothpick to dip in coloring) to bring the icing to a very pale pink color. This icing needs to be a fairly thick, because you will be using it to outline the cookies and add ruffles. It should drop from the spoon but hold its shape when dropped into the bowl. If it’s too thick to pipe from a bag, add a little liqueur (or water), a few drops at a time. If it’s too thin, add a little powdered sugar and mix well.
- To the icing in the original large bowl, add liqueur (or water) 1/2 teaspoon at a time, until mixture flows from the spoon and blends into the icing in the bowl within seconds. It needs to flow, but shouldn’t be watery (picture the thickness of molasses or corn syrup). Add enough food coloring to create a deep pink color.
- Place half of the thicker, light-colored icing into a disposable pastry bag or freezer-type plastic zipper bag. Cut a small piece of the tip off and test by squeezing a small amount out. The outline works as a dam to hold in the thinner icing, so the tip needs to be large enough to make a sturdy line of icing around the cookie.
- The thin dark pink icing also goes in a bag with a little larger piece of the tip cut off to allow the icing to flow easily. Only put as much in the bag as you can handle to avoid mess. Cover the remaining icing in the bowl.
- With the light pink icing, squeeze a line all the way around the edge of a cooled chocolate heart cookie, approximately 1/4-inch from the edge, leaving room for decorative ruffles. You can do one cookie at a time, or do all of the edges at once.
- With the thin dark pink icing, fill in the cookie, using a toothpick to fill in any holes and bring the icing all the way to the piped outline. Tap gently to settle the icing. (Note: if you have time, allow the cookies to dry for a few hours before moving to the next step.)
- After all chocolate heart cookies are outlined and filled, put the remaining light pink icing in a pastry bag with a small rose petal tip. With the thick side of the tip opening facing the outline, work your way around the cookie, moving the tip in and out slightly while squeezing, just outside the outline. (If you don’t have a rose petal tip, simply pipe dots all the way around.)
- Go around the outline at the base of the ruffles, making small dots, using the leftover outline icing.
- Allow the cookies to dry undisturbed for at least 6 hours. Then gift and enjoy!
This post contains affiliate links to Amazon, which means that I may earn a small commission from some of the links in this post. Please see our Disclosure Page for more information.
You might also be interested in: Valentine’s Day Chocolate-Dipped Shortbread Cookies
